11 Campervan Kitchen Ideas for Tiny Travel Cooking Zones
Cooking in a campervan doesn't have to feel cramped or chaotic. With a few thoughtful decor choices, your tiny kitchen can become a bright, inviting space that makes meal prep a pleasure.
The key is balancing style with practicality—choosing pieces that look good and earn their keep.
Whether you're a weekend wanderer or a full-time van lifer, these ideas will help you create a kitchen that feels open, organized, and effortlessly chic.
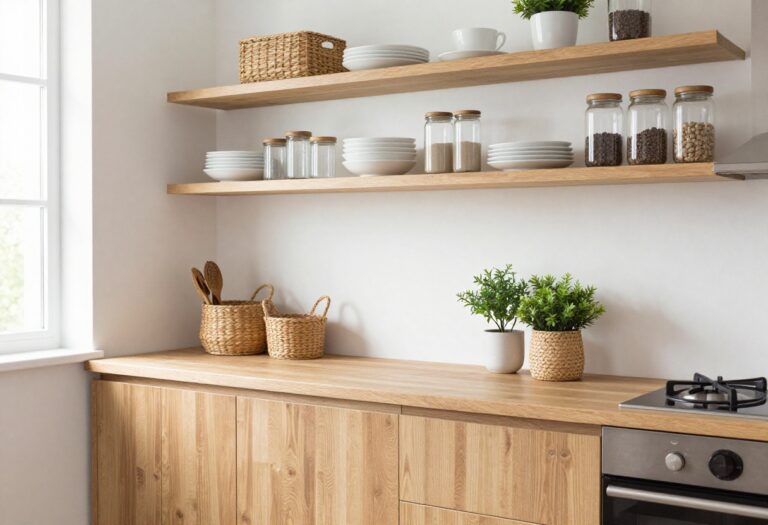
1. Open Shelving with a Light Touch
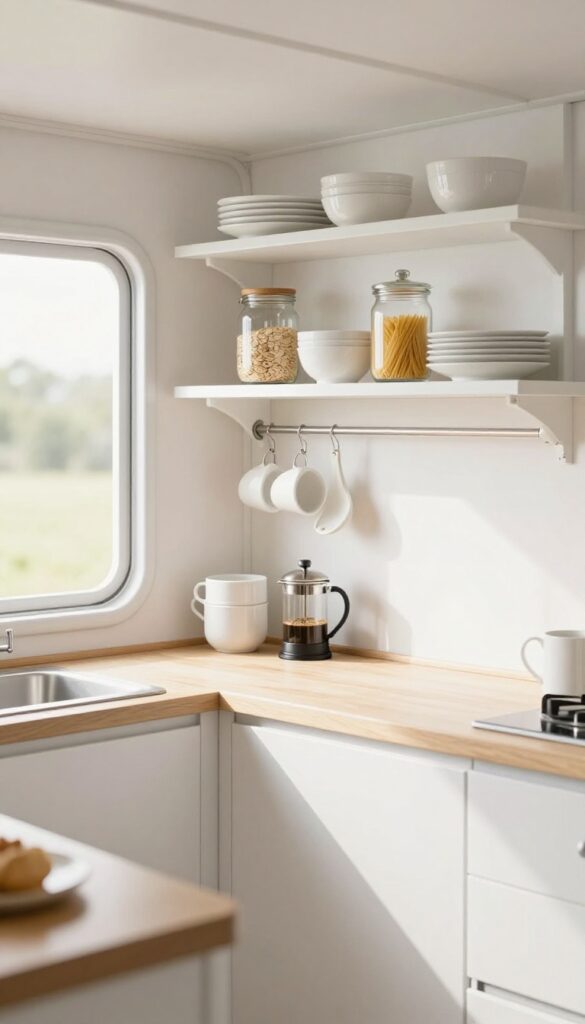
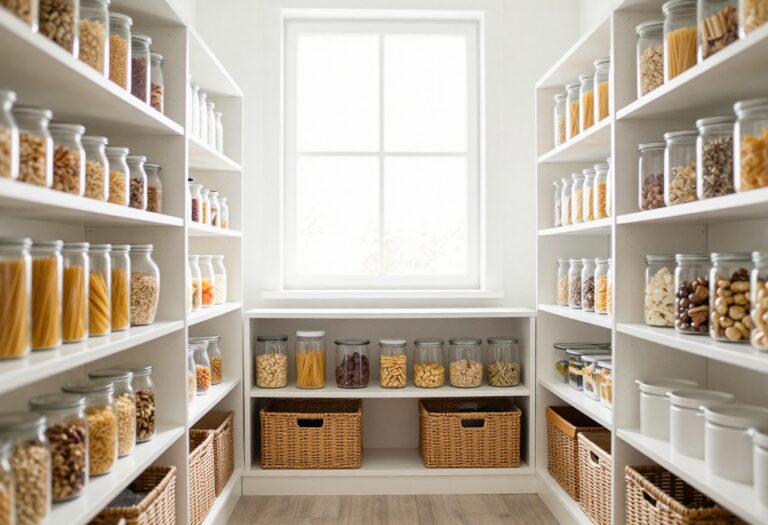
Bulky overhead cabinets can make a tiny campervan kitchen feel cramped and closed in. Swapping them for slim open shelves in white or light wood instantly opens up the space, letting light bounce around and making the whole area feel bigger. This approach keeps everyday dishes and pantry staples within easy reach while adding a casual, airy vibe that suits life on the road.
Open shelving is a smart swap for campervan kitchens where every inch counts. By removing cabinet doors and heavy framing, you gain visual breathing room and a chance to display your favorite mugs, plates, and jars of staples like pasta or oats. Stick to a light color palette—white, pale oak, or birch—to keep the look cohesive and bright.
The key is to edit ruthlessly: only keep items you use regularly, and arrange them in small groupings for a styled but functional feel. A slim rail underneath can hold hooks for mugs or utensils, adding even more storage without clutter.
Best Materials
Go for lightweight woods like pine or birch plywood, painted white or left with a clear matte finish. Avoid dark stains or heavy grain patterns that can feel visually heavy in a small space. For a modern twist, try slim metal shelves in matte white or brushed aluminum—they're durable and easy to wipe down.
Layout Tip
Install shelves at staggered heights to fit taller items like oil bottles or a French press on one level and shorter cups or spice jars on another. Leave at least 18 inches of clearance above the counter so you can prep food without bumping your head. If your van has curved walls, custom-cut shelves to maximize every inch.
Shelf Styling Tip
Keep it minimal: group three to five items per shelf, mixing everyday ceramics with a small plant or a wooden cutting board for warmth. Use clear glass jars for dry goods so they double as decor. Rotate items seasonally to keep the look fresh—think citrus tones in summer and warm spices in fall.
2. Magnetic Knife Strip and Spice Rack
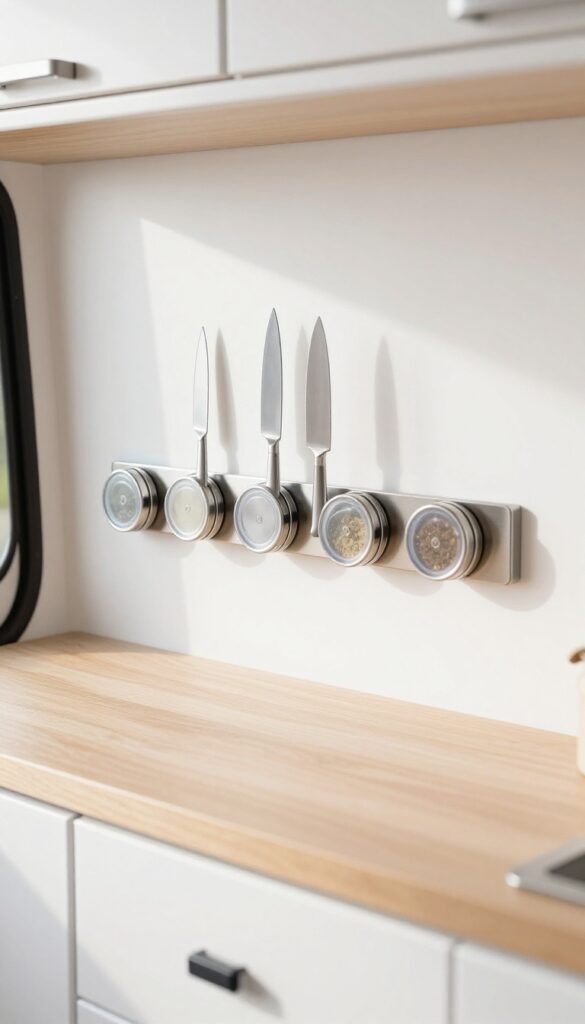
Counter space is precious in a campervan, so anything that frees it up while keeping tools handy is a win. A magnetic strip mounted on the wall does double duty: it holds knives securely and can also support small metal tins for spices. The result is a clean, uncluttered look that feels modern and intentional.
Plus, having your most-used items within arm's reach makes cooking in tight quarters feel effortless.
Mounting a magnetic strip is one of those small swaps that changes how you use your kitchen. Instead of digging through a drawer for a knife or hunting for the oregano, everything is right there on the wall. It also adds a sleek, professional vibe that elevates the whole space.
Choose a strip long enough to hold your daily knives and a few spice tins, and position it where you naturally reach—usually above the prep area or beside the stove.
Best Materials
Go for a stainless steel or powder-coated magnetic strip that resists rust and matches your campervan's hardware. For the spice tins, small round or rectangular metal tins with clear lids work best—they keep contents visible and protected from moisture. Avoid plastic or wood strips, as they may not hold knives securely over time.
Layout Tip
Mount the strip horizontally at a height that's comfortable for grabbing knives—usually around eye level or slightly below. Leave a few inches of space on either end for spice tins, and make sure the strip is securely anchored into a stud or using heavy-duty adhesive rated for the weight. This keeps everything stable while driving.
Finishing Touch
To keep the look cohesive, use matching tins with labels in a consistent font. A small wooden or acrylic shelf above the strip can hold a plant or a tiny jar of utensils, adding warmth without clutter. The combination of metal and natural textures keeps the space feeling light and airy.
3. Fold-Down Countertop Extension
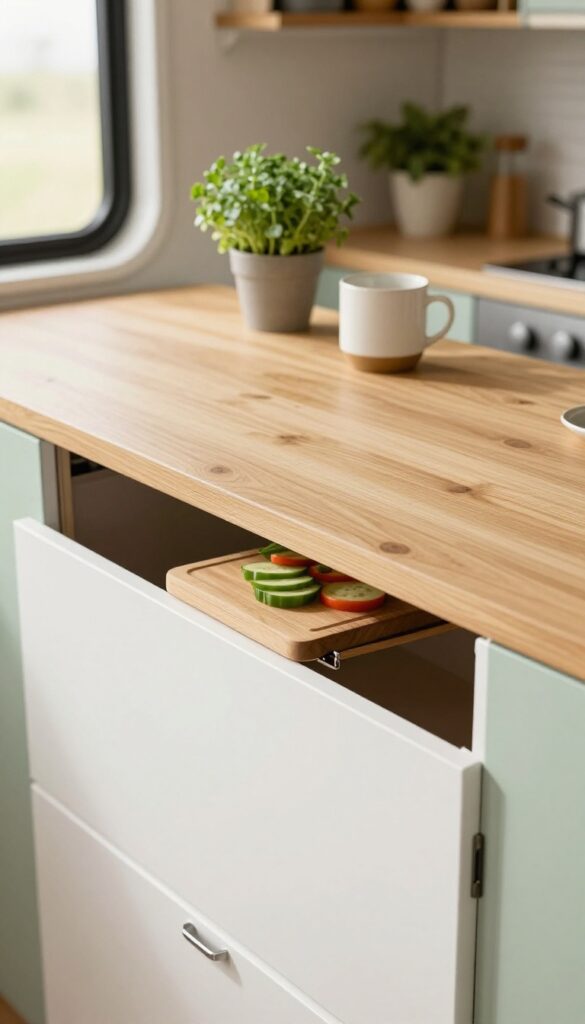
When every inch counts, a fold-down countertop extension feels like a secret weapon. It gives you a full prep surface when you need it and disappears when you don't—no permanent footprint. Plus, it adds a cozy, handmade touch that makes the kitchen feel more like home.
A hinged wooden board mounted to the side of a cabinet or wall can transform a cramped cooking zone. When folded down, it offers extra workspace for chopping, assembling ingredients, or even setting down a hot pan. When not in use, it tucks flat against the wall, freeing up the floor and keeping the space open.
Choose a soft pastel like sage green or blush to keep the look light and airy, or go with natural oak or birch for warmth. The key is to mount it at a comfortable height—usually level with your main counter—and add a small support bracket or folding leg for stability. Finish with a clear sealer or food-safe oil to protect the surface from spills and stains.
Best Colors And Finishes
- Stick with light, airy tones to maintain the open feel. Pastel shades like powder blue, pale yellow, or soft pink add a gentle pop of color without overwhelming the space. If you prefer a natural look, white oak or bamboo with a matte finish keeps things bright and organic.
- For a subtle contrast, paint the underside of the board a slightly darker shade—this creates visual depth when the extension is folded down.
Smart Mounting And Support
- Use heavy-duty hinges rated for the weight of the board and anything you'll set on it. A fold-down metal bracket or a slim wooden leg that swings out adds extra support without looking bulky. Position the extension near your stove or sink for easy access while cooking.
- If space is really tight, consider a narrow board (just 8–10 inches deep) that works as a landing zone for utensils or a coffee station.
Styling When Folded
- When the extension is up, treat it like a mini shelf. Lean a small cutting board against it, hang a lightweight utensil holder on the edge, or attach a magnetic strip for knives. A small hook underneath can hold a dish towel or a set of measuring cups.
- This way, even when it's not in use, it still contributes to the kitchen's function and charm.
4. Light-Colored Backsplash with Peel-and-Stick Tiles
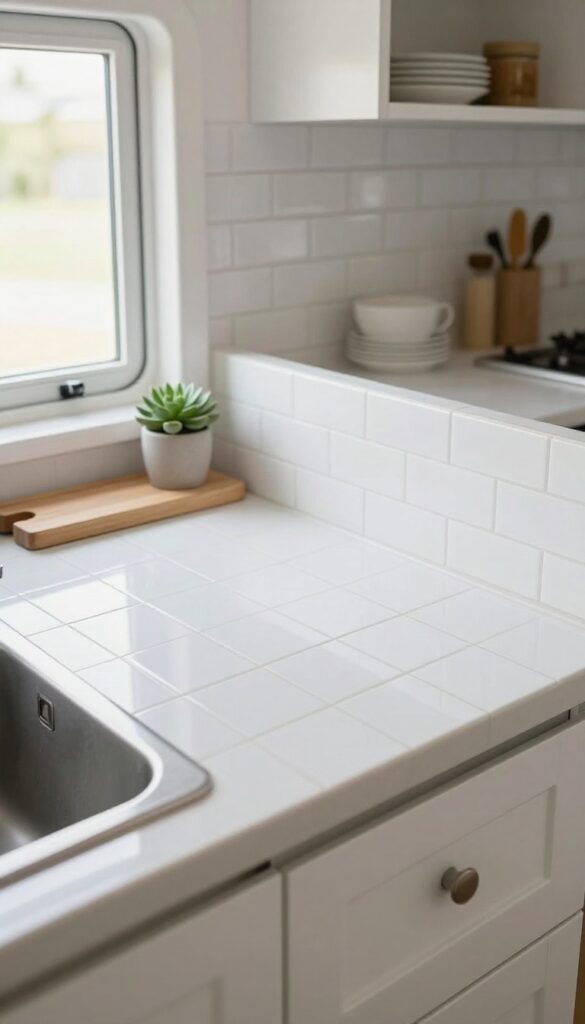
A backsplash might seem like a big commitment in a campervan, but peel-and-stick tiles make it a total no-brainer. In a tiny cooking zone, every surface matters, and a light-colored backsplash does double duty: it reflects natural light and makes the whole space feel bigger, while also protecting your walls from splatters. White or pale blue subway tiles are a classic choice that instantly brightens the area without overwhelming the compact layout.
Peel-and-stick tiles are the secret weapon for campervan kitchens. They're lightweight, easy to cut with scissors, and require no grout or special tools. The adhesive is strong enough to stay put on the road, but if you ever want to change the look, they peel off without damaging the walls.
For a light and airy vibe, stick with glossy white or soft blue tones—these colors bounce light around and make the kitchen feel less like a closet and more like a cozy galley. The subtle texture of subway tile adds visual interest without clutter, keeping the space feeling clean and intentional.
Best Colors And Finishes
Glossy white is the top pick for maximizing light reflection, but if you want a hint of color, pale blue or soft gray are excellent alternatives. Avoid dark or matte finishes in a tiny kitchen—they absorb light and can make the space feel smaller. A high-gloss finish also makes wiping down grease and food splatters a breeze, which is a huge plus in a campervan.
Installation Tips For Tight Spaces
- Measure your backsplash area carefully and order a few extra tiles to account for mistakes or future replacements. Peel-and-stick tiles are forgiving: you can reposition them within a few minutes of application. For corners and edges, use a sharp utility knife to trim tiles cleanly.
- No need for a wet saw—just a straight edge and a steady hand. If you're installing around a window or vent, make a paper template first to ensure a perfect fit.
Styling The Surrounding Area
- Keep the countertops clutter-free to let the backsplash shine. A small wooden cutting board, a single plant in a white pot, and a minimalist soap dispenser are all you need. If you have open shelving above, use light-colored dishes or glass jars to maintain the airy feel.
- The goal is to create a cohesive, uncluttered look that makes the tiny kitchen feel like a deliberate design choice, not a compromise.
5. Hanging Fruit and Veggie Hammock
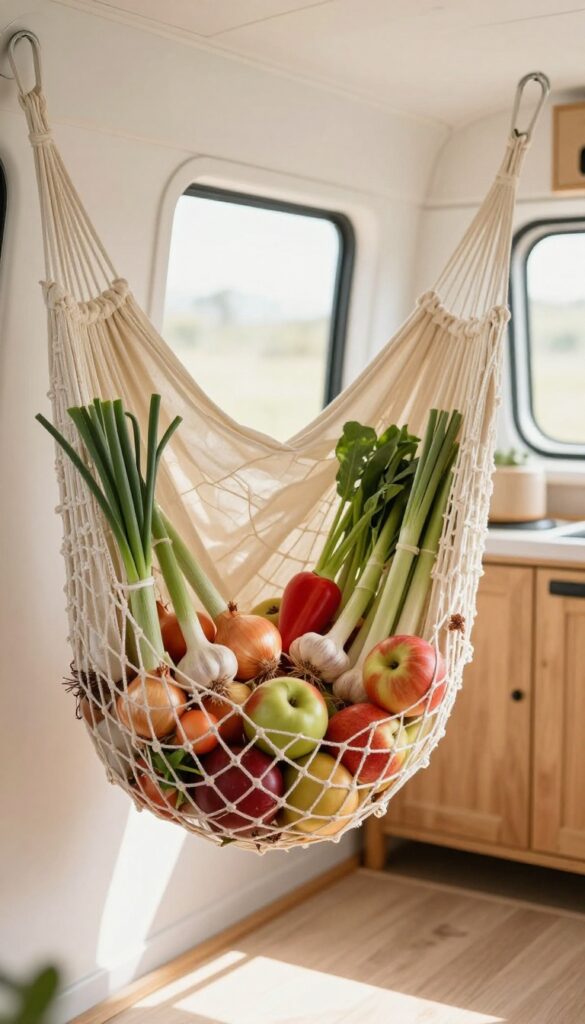
In a campervan kitchen, every inch of counter and cabinet space is prime real estate. A hanging hammock for your produce is a clever way to free up that precious room while adding a breezy, boho vibe. Imagine a soft mesh sling suspended in an unused corner, cradling onions, garlic, or apples—it's both functional and visually light.
This idea keeps your ingredients within easy reach and turns a practical storage need into a charming decor moment.
A hanging fruit and veggie hammock is the ultimate space-saving trick for tiny campervan kitchens. By using vertical space that would otherwise go to waste, you keep your counters clear and your produce airy—no more rummaging through dark cabinets. The mesh material allows air circulation, helping your fruits and vegetables stay fresher longer.
Plus, the visual effect is instantly playful and inviting, softening the utilitarian feel of a compact cooking zone. Choose a neutral cotton or jute hammock for a natural look, or go with a bright color to inject personality. Hang it near a window or above the sink for easy access, and watch it become a conversation starter.
Best Materials And Colors
- For a light and airy feel, stick with natural fibers like cotton, jute, or macramé in cream, beige, or soft pastels. These materials blend seamlessly with boho or minimalist decor. If you want a pop of color, a mustard yellow or sage green hammock adds a playful touch without overwhelming the space.
- Avoid dark or heavy fabrics that can make the area feel cramped.
Where To Hang It
- Look for an unused corner near the ceiling, ideally above the counter or sink. Use a sturdy hook anchored into a cabinet or wall stud. Make sure the hammock hangs low enough to reach easily but high enough to clear your head.
- A spot near a window is perfect—natural light highlights the produce and makes the hammock feel like a decorative feature.
Styling And Finishing Touch
Keep the hammock clutter-free by storing only 3-5 items at a time—think onions, garlic, lemons, or small squash. Pair it with a small trailing plant or a string of fairy lights draped nearby to enhance the boho aesthetic. The result is a functional storage solution that feels intentional and curated, not just an afterthought.
6. Slim Rolling Cart for Extra Storage
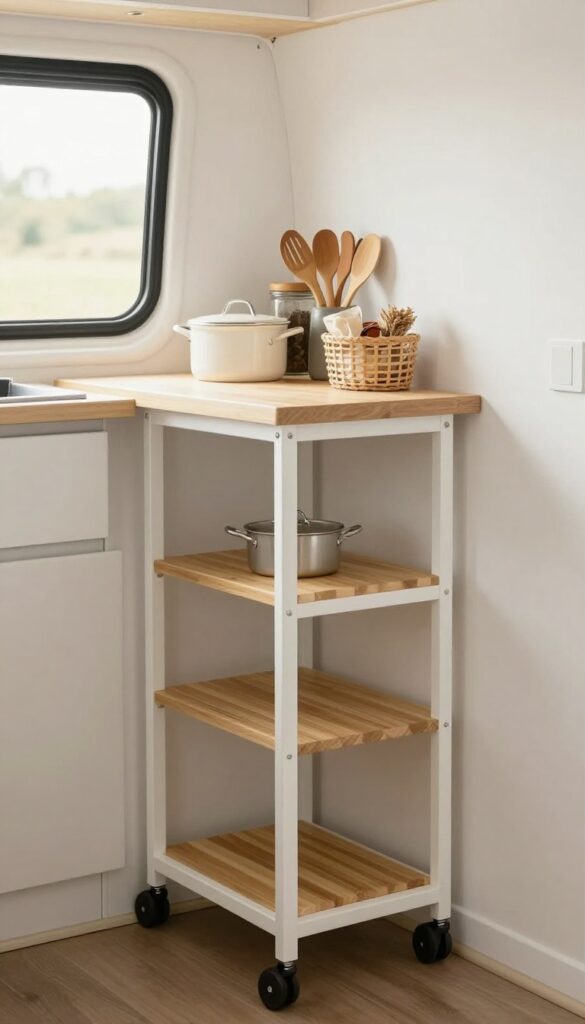
A narrow rolling cart is the unsung hero of tiny kitchens. It slides into that awkward gap between your counter and the wall, turning dead space into a mobile pantry. When you need it, it rolls out smoothly; when you don't, it tucks away without stealing precious floor area.
The light, airy feel comes from choosing a cart with open shelving and a pale finish, so it never feels bulky or heavy.
This idea is perfect for campervan kitchens where every inch counts. A slim cart (around 12–18 inches wide) can hold your daily-use pots, pans, or dry goods, and its mobility makes it easy to access items stored behind. Plus, it adds a layer of flexibility—use it as a prep station outdoors or a serving cart when parked.
Best Colors & Materials
Stick with light woods like bamboo or whitewashed oak to keep the space feeling open. White metal frames with wire baskets also work beautifully, adding a touch of industrial charm without weighing down the look. Avoid dark woods or heavy metals—they can make a small kitchen feel cramped.
Storage Tip
Use the top shelf for frequently used items like cooking oil, spices, and utensils. Reserve the lower shelves for heavier pots or backup pantry goods. Add small bins or baskets to corral loose items and keep the cart looking tidy.
Layout & Placement
Measure the gap between your counter and the wall or between the counter and the fridge. A cart with locking wheels is a must for safety while driving. Position it so it doesn't block the main walkway—ideally, it should slide into a niche or beside the stove.
7. Under-Sink Organizer with Baskets
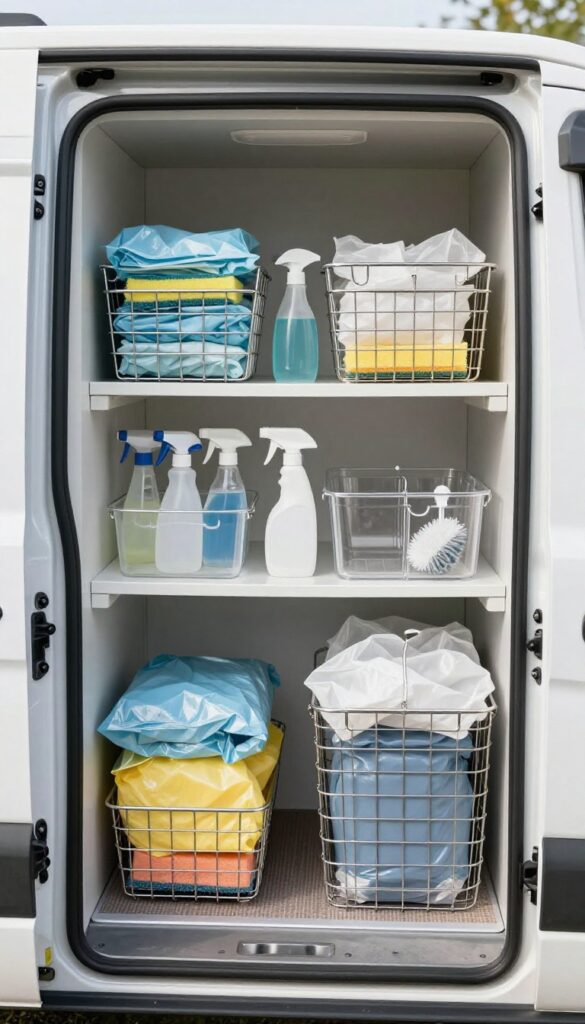
That cramped cabinet under the sink can easily become a black hole of sponges, spray bottles, and mystery leaks. But with a few stackable bins or wire baskets, you can turn it into a tidy little station that makes grabbing a trash bag or scrub brush feel almost satisfying. The key is choosing containers that slide out easily so nothing gets lost in the back.
Start by measuring the space around the plumbing—most under-sink areas have an awkward U-shape, so look for baskets that fit around the pipes. Clear plastic bins let you see contents at a glance, while wire baskets with handles add a breezy, airy look that matches the light-and-airy angle. Group like items together: cleaning supplies in one bin, trash bags and sponges in another.
For a polished finish, line the cabinet floor with a waterproof mat to catch drips.
Best Materials
- Stick with materials that can handle moisture and occasional drips. Wire baskets with a coated finish are lightweight and allow air circulation, preventing mildew. Clear acrylic bins are another smart choice—they're easy to wipe down and keep the space feeling open.
- Avoid solid wood or unsealed wicker, which can warp or stain over time.
Layout Tip
- Use a tension rod under the sink to hang spray bottles from their triggers. This frees up floor space for your stackable bins and keeps bottles upright and accessible. Pair the rod with small S-hooks for scrub brushes or gloves.
- It's a simple trick that makes the most of vertical real estate without cluttering the counter.
Finishing Touch
Add a small adhesive hook inside the cabinet door to hang a dish towel or a reusable grocery bag. This keeps essentials within arm's reach and adds a subtle layer of organization. Choose a hook in brushed nickel or matte black to tie into your cabinet hardware for a cohesive look.
8. Compact, Multi-Functional Cookware Set
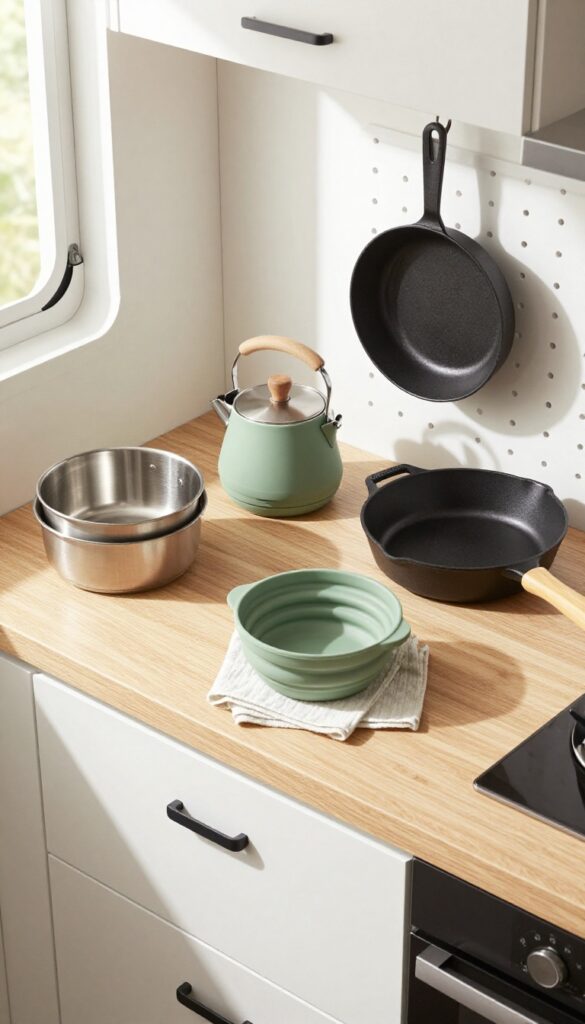
When every inch counts, your cookware should work as hard as you do. A compact, multi-functional set is the secret to a clutter-free campervan kitchen. Think nesting pots that stack neatly inside each other, a collapsible kettle that flattens for storage, and a frying pan that doubles as a lid.
The beauty is in the details: matte black or soft sage finishes keep things looking intentional, not chaotic. This isn't about sacrificing style for space—it's about choosing pieces that earn their spot.
Start with a nesting pot set, typically three sizes that fit into one another like Russian dolls. Pair them with a collapsible silicone kettle that folds down to just a few inches tall. A cast-iron skillet is a worthy splurge; it heats evenly, works on induction, and can go from stovetop to table.
Store everything in a deep drawer or a dedicated cabinet with adjustable dividers. The visual effect is clean and calm—no jumble of mismatched lids or awkward handles poking out. To keep the light and airy vibe, opt for cookware in pale neutrals or with wooden handles that warm up the space.
Best Materials
Look for hard-anodized aluminum or stainless steel with a nonstick coating—lightweight, durable, and easy to clean. Silicone collapsible items are a must for kettles and measuring cups. Avoid heavy cast iron if you're tight on weight, but a small enameled Dutch oven can double as a serving dish and adds a pop of color.
Storage Tip
Use a pegboard inside a cabinet door to hang pot lids and utensils. For the nesting pots, store them with a microfiber cloth between each to prevent scratches. A magnetic knife strip on the wall frees up drawer space and keeps blades accessible.
Finishing Touch
Add a slim bamboo cutting board that fits over the sink, giving you extra prep space. Choose one with a juice groove and a handle that hooks onto a towel bar. This small addition ties the whole setup together and reinforces the smart, space-aware style.
9. Window-Mounted Herb Planter
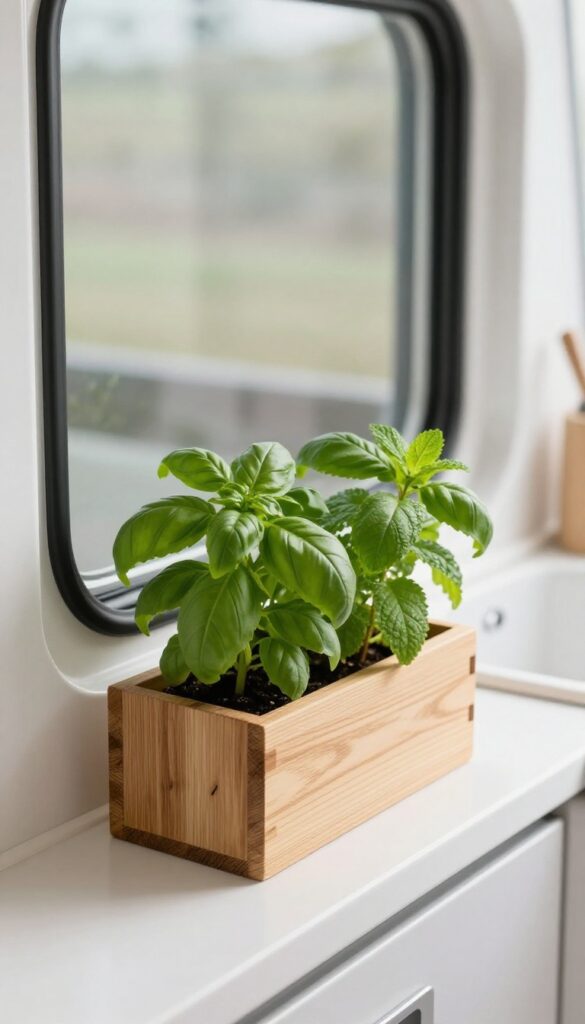
A small window-mounted herb planter turns an often-overlooked spot into a living pantry. Fresh basil, mint, or chives sit right at eye level, so you can snip a few leaves while cooking without taking up counter space. The natural green against a white or wood-toned window frame adds a soft, airy feel that makes the camper feel more like a real home.
Mounting a planter directly on the window sill keeps herbs within arm's reach and lets them soak up sunlight. Choose a slim, rectangular box that fits the sill depth, and opt for herbs that thrive in partial sun—basil, parsley, and chives are easy starters. The visual effect is instant life and color, breaking up the monotony of cabinets and countertops.
Plus, the scent of fresh herbs every time you open the window is a simple pleasure that makes tiny travel cooking feel special.
Best Herbs For A Camper Kitchen
Stick with compact, low-maintenance herbs that don't mind being trimmed regularly. Basil, mint, chives, and thyme are top choices because they grow well in small containers and recover quickly from harvesting. Avoid sprawling herbs like dill or cilantro that need more root space—they'll struggle in a narrow planter.
Mounting And Drainage Tips
Use a planter with a built-in drainage tray or drill a small hole and place a saucer underneath to catch excess water. Secure the planter with brackets or suction cups rated for the weight of wet soil. A lightweight plastic or resin planter is safer than ceramic on a moving vehicle, and it won't rust like metal might.
Styling The Window Area
Keep the look clean by choosing a planter that matches your cabinet hardware or window trim—black, white, or natural wood finishes work best. Place the planter on the sunniest window, ideally above the sink or prep area. A small watering can tucked nearby completes the vignette without cluttering the counter.
10. Soft, Washable Runner Rug

A runner rug is one of those small touches that makes a campervan kitchen feel like a real kitchen. Instead of cold vinyl or metal flooring, a soft, machine-washable runner in a light neutral or striped pattern adds warmth, defines the cooking zone, and gives your feet a break while you're prepping meals. The best part?
It's easy to toss in the wash after a week of spills and crumbs.
For a light and airy campervan, choose a runner in cream, pale grey, or a soft stripe with white and sand tones. Thin, flat-weave rugs work best because they don't bunch up underfoot or catch on cabinet doors. Look for materials like cotton, polyester, or a blend that can handle frequent washing without fading.
A runner that's around 2×3 feet or 2×5 feet fits perfectly in the galley aisle without overwhelming the space. To keep it from sliding around, add a non-slip rug pad underneath or use double-sided carpet tape. This simple layer makes the kitchen feel more like a cozy home and less like a temporary setup.
Best Colors And Patterns
Stick with light neutrals—cream, oatmeal, soft beige, or pale grey—to keep the van feeling open and airy. A subtle stripe or geometric pattern adds visual interest without making the space feel busy. If you want a little color, try a muted blue or sage green stripe that ties into your overall palette.
Material And Care Tips
Choose a flat-weave cotton or polyester blend that's thin enough to dry quickly after washing. Avoid thick shag or high-pile rugs that trap dirt and take forever to dry. Machine-washable is non-negotiable—look for rugs labeled as such and always air-dry to prevent shrinking.
Layout And Safety
- Measure your galley aisle before buying. The rug should fit without overlapping cabinet doors or the stove area. Use a non-slip pad or gripper tape underneath to keep it from sliding while you're driving or cooking.
- A runner that's too long can bunch up, so keep it short and secure.
11. LED Strip Lighting Under Cabinets
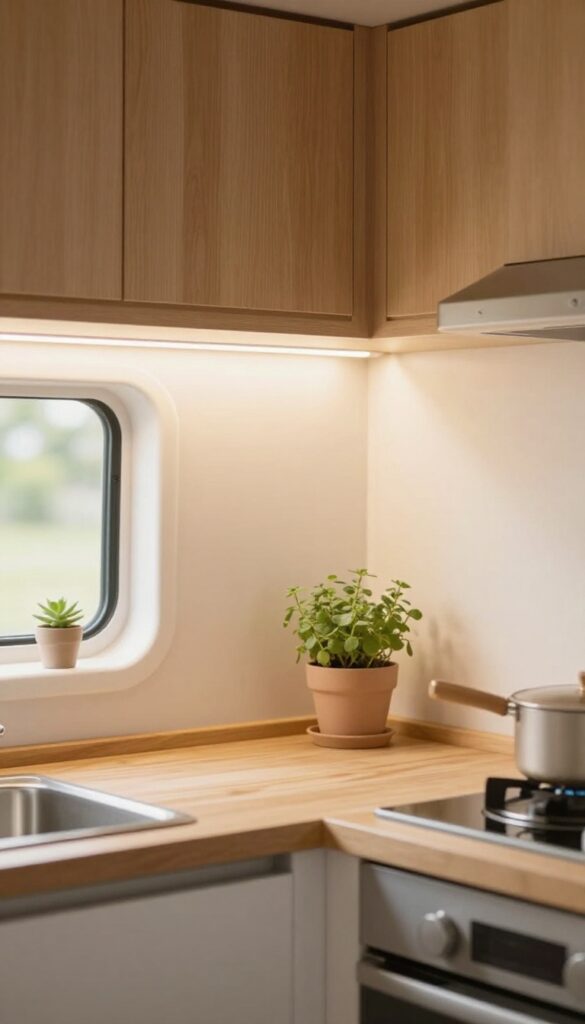
In a campervan, every inch counts, and lighting is no exception. Under-cabinet LED strips are a game-changer for tiny kitchens, offering bright task lighting for meal prep without eating up counter space. They also double as ambient lighting, casting a soft, warm glow that makes the van feel cozy after sunset.
Battery-operated options mean no hardwiring, so you can install them anywhere—even in a rental or DIY build.
LED strip lighting is one of the smartest upgrades for a campervan kitchen. It’s affordable, easy to install, and instantly transforms the cooking zone from a dark corner into a functional workspace. The key is choosing the right color temperature: warm white (2700K–3000K) keeps the space feeling inviting, while cool white (4000K–5000K) is better for precise tasks like chopping veggies.
Stick with warm tones for that light-and-airy vibe. Mount the strips under upper cabinets or shelves, facing down, to illuminate the counter without glare. Use adhesive backing or small clips—no tools required.
For a polished look, hide the wires inside cabinet channels or along the back edge. And don’t forget a dimmer switch; it lets you adjust brightness from bright cooking mode to soft evening ambiance.
Placement Tips
Mount the strips as close to the front edge of the cabinet as possible so light hits the countertop, not the wall. In a campervan, where ceilings are low, this also prevents shadows from your own body. If you have open shelving, stick the strip underneath the shelf above—it’ll highlight your dishes and mugs too.
Battery Vs. Hardwired
- Battery-operated LED strips are the easiest route for a van conversion. They run on AAAs or rechargeable USB packs, so no wiring is needed. Just stick them up and replace batteries every few months.
- Hardwired strips, while more permanent, require 12V DC connections—great for full-time builds but overkill for weekend warriors.
Finishing Touch
To keep the look clean, use aluminum channels or diffusers that soften the light and hide the individual LEDs. This creates a seamless glow rather than spotty dots. Pair with a remote control or motion sensor for hands-free operation—perfect when your hands are full of ingredients.
FAQ
How can I make my campervan kitchen feel bigger?
Use light colors, open shelving, and mirrors to reflect light. Keep countertops clear with vertical storage solutions like magnetic strips and hanging organizers.
What are the best materials for campervan kitchen decor?
Opt for lightweight, durable materials like bamboo, stainless steel, and melamine. Avoid heavy stone or glass that can add weight and break during travel.
How do I keep my campervan kitchen organized on the road?
Use drawer dividers, stackable containers, and tension rods to secure items. Everything should have a designated spot to prevent shifting while driving.
Can I use real plants in a campervan kitchen?
Yes, but choose low-maintenance herbs or succulents that thrive in indirect light. Secure pots with non-slip mats or suction cup holders to prevent spills.
What lighting works best for a campervan kitchen?
LED strip lights are energy-efficient and provide bright task lighting. Warm white bulbs create a cozy atmosphere without draining your battery.
Conclusion
Designing a campervan kitchen is all about making smart, stylish choices that maximize every inch. By focusing on light colors, multi-functional pieces, and clever storage, you can create a space that feels open and inviting—even on the road.
These 11 ideas prove that a tiny kitchen can still be beautiful and highly practical. So go ahead, give your van a kitchen upgrade that makes every meal an adventure.